For monitoring or remote control applications, where your Raspberry plays the role of a remote station which allows you to acquire a measurement (temperature, image, video) or carry out a remote action (servo, light, sound), it can be useful to simply configure a Raspberry card without using a keyboard or screen. Here is the procedure:
The method in a few words
This is how we will proceed in this tutorial:
- We are going to prepare an operating system for our Raspberry
- A specific setting to allow Raspberry communication on the network will be added
- The Raspberry is then powered and connected to the network (here wired, but also applies to Wi-Fi connections) and accessed remotely from any other computer on the network via SSH
I needed to go through these steps to make a camera trap for bird watching near a bird feeder in my garden. And to avoid juggling 2 screens and two keyboards/mouses to configure it, I made it available on my network as soon as it was initialized.
But to get there, you have to know about the Secret Menu!
Choose an operating system
Complete information is available here: https://www.raspberrypi-france.fr/guide/systeme-exploitation-raspberry-pi/. But to keep it simple, we will opt for a distribution based on Linux – Raspbian – which is the reference and a bit of a default choice for your Raspberry.
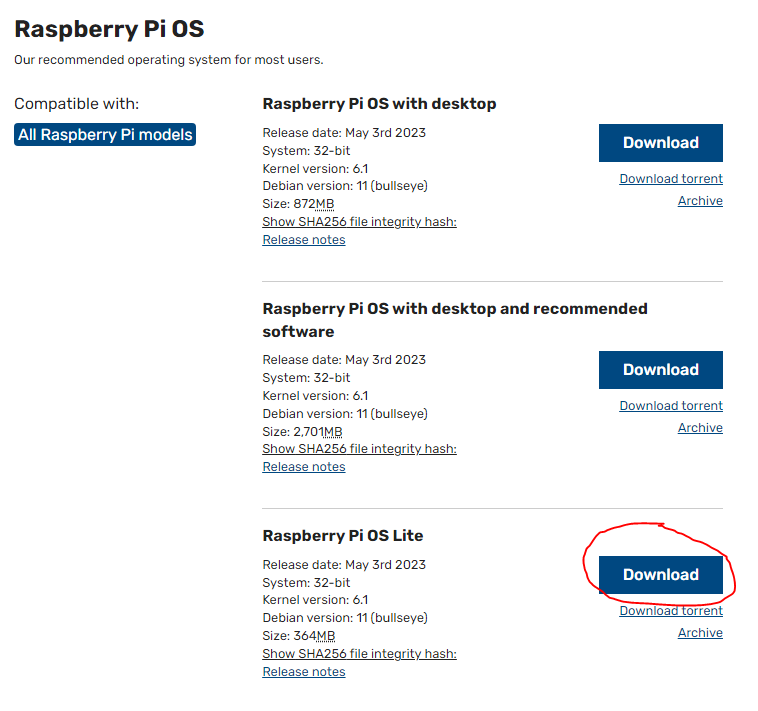
We will opt for the compatible version of all Raspberry cards to date: Raspberry Pi OS Lite. This is a version that is packaged without a graphical environment, with the bare minimum. We download from this address – https://www.raspberrypi.com/software/operating-systems/ – an executable:
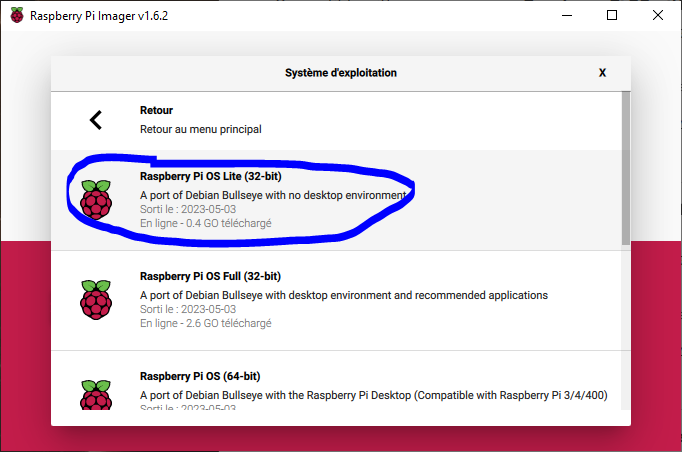
We retrieve an .xz file which functions as an executable: we double click to start it. To choose the operating system, click on the line which contains the name of the selected operating system:
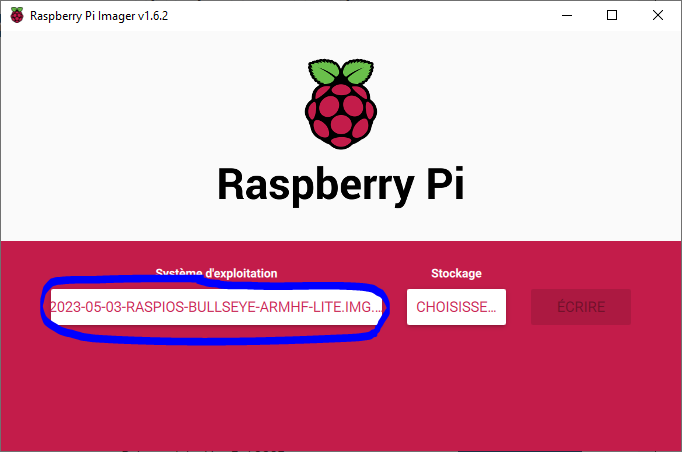

We also choose the storage medium: at this time you must insert and select the SD card which you will then insert into your Raspberry.
The Secret Menu! Ctrl+Shift+X
Before clicking on Write and preparing our SD card, you should know that by default, incoming network connections on the Raspberry are disabled. We will therefore reactivate them and decide on a password. To do this, you must press the key combination Ctrl + Shift + X to bring up the hidden configurator menu as below:
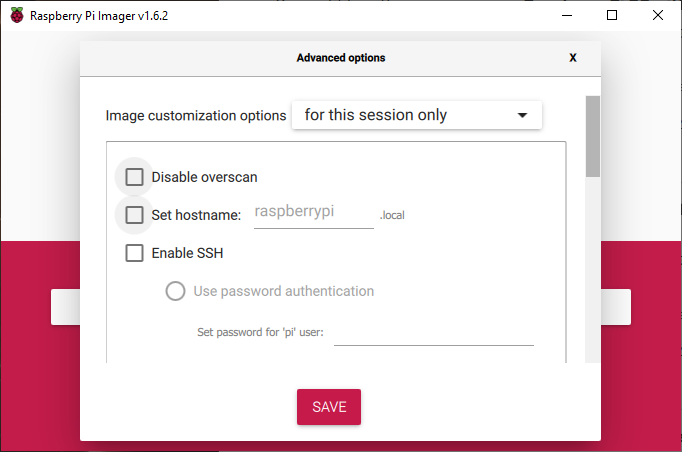
For our application we will:
- check the enable SSH box: this will allow us to connect remotely
- Choose password authentication. the account is necessarily named pi.
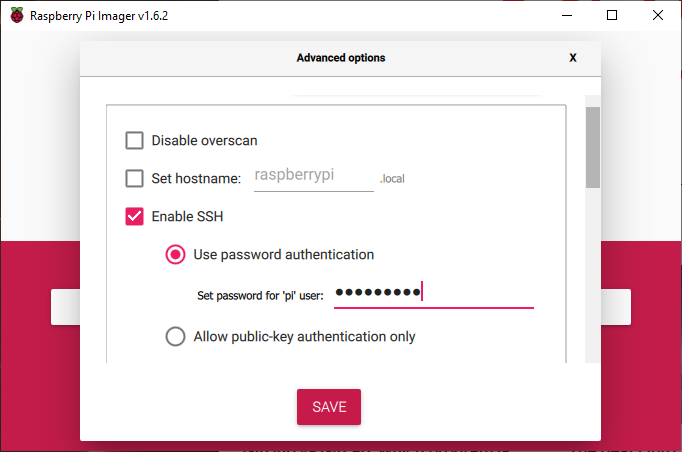
We click on Save and then we can click on Write to start configuring the SD card.
Turning on the Raspberry and connecting remotely
The rest is therefore made very simple by these preliminary configuration steps. We insert the SD card into the Raspberry, plug in a network cable and plug in the power. Ignition is immediate. The default hostname is raspberrypi. All that remains is to monitor the network to detect complete ignition. To do this, type the following command in a terminal, repeatedly until you get a response. On an older model, like my Raspberry Pi 1 Model B from 2012, startup can take a good couple of minutes.
To type these and subsequent commands, I opt for a bash terminal emulator for Windows like MobaXterm.
ping raspberrypi 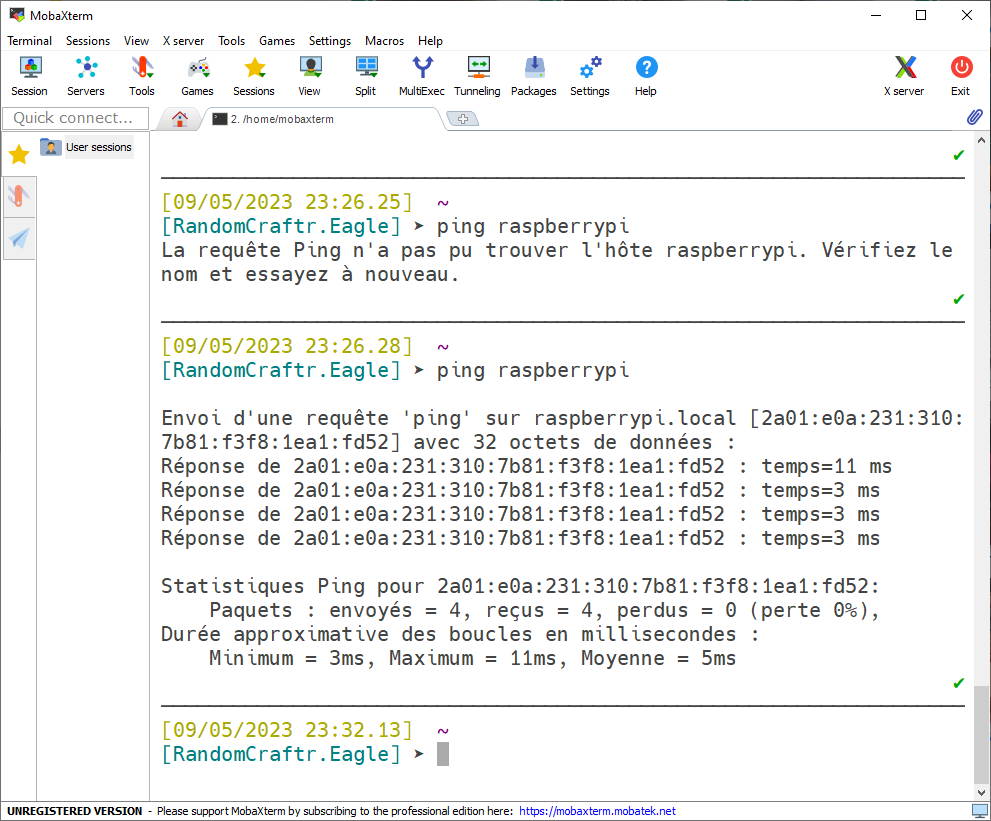
We can now connect remotely. To do this, we use an ssh connection with the password configured above and the pi account, via the command:
ssh pi@raspberrypi
Don’t be surprised, no characters appear on the screen when you type your password. When the command prompt changes to pi@raspberrypi:, you are confirmed to have succeeded.
You have configured a Raspberry card without connecting a keyboard or screen, and accessible remotely via a network connection. You are then free to configure it to automate a task, such as taking photos of a bird feeder!
